Earthquake Emergency Kit: The Complete Small-Space Guide
If you live in an apartment or rental, building an earthquake emergency kit that actually fits your space is one of the most practical things you can do before disaster strikes. This guide breaks down every category of supply, shows you where to store it, and gives you 12 photorealistic image concepts to make the process visual and actionable.
What Should Be in an Earthquake Emergency Kit?
Here is the short answer. Your earthquake emergency kit needs these items for each person in your household: water (1 gallon per person per day, minimum 3 days), nonperishable food, a first aid kit, LED flashlight, extra batteries, a battery-powered emergency radio, a whistle, a multi-tool, duct tape, N95 dust masks, copies of important documents, and basic toiletries.
Emergency management guidelines recommend preparing a kit for at least 72 hours after an earthquake. That makes this a 72-hour earthquake survival kit at its core. If you have the space and budget, stretch to 7 days of supplies, particularly water.
At Small Space Emergency, every recommendation is built for compact living. All of the following items fit into roughly two cubic feet of storage, split between a stay-at-home earthquake bag stored in a closet or under the bed and a smaller grab-and-go emergency kit near your front door.
Three fastest first steps to start right now:
- 1Buy 3 gallons of water per person and store them low, under the bed or in a bottom cabinet.
- 2Assemble a basic first aid kit with bandages, antiseptic wipes, gauze, and any prescription medications you take daily.
- 3Place a pair of sturdy shoes and a flashlight next to your bed tonight.
Keep a sturdy pair of shoes under your bed; a signaling whistle can help locate trapped individuals after a quake, so clip one to your earthquake bag.
Photo Concept List: 12 High-Impact Images
Every image below follows the same clean, modern style: neutral backgrounds, consistent warm-neutral color palette, soft natural light, HDR processing, and photorealistic detail.
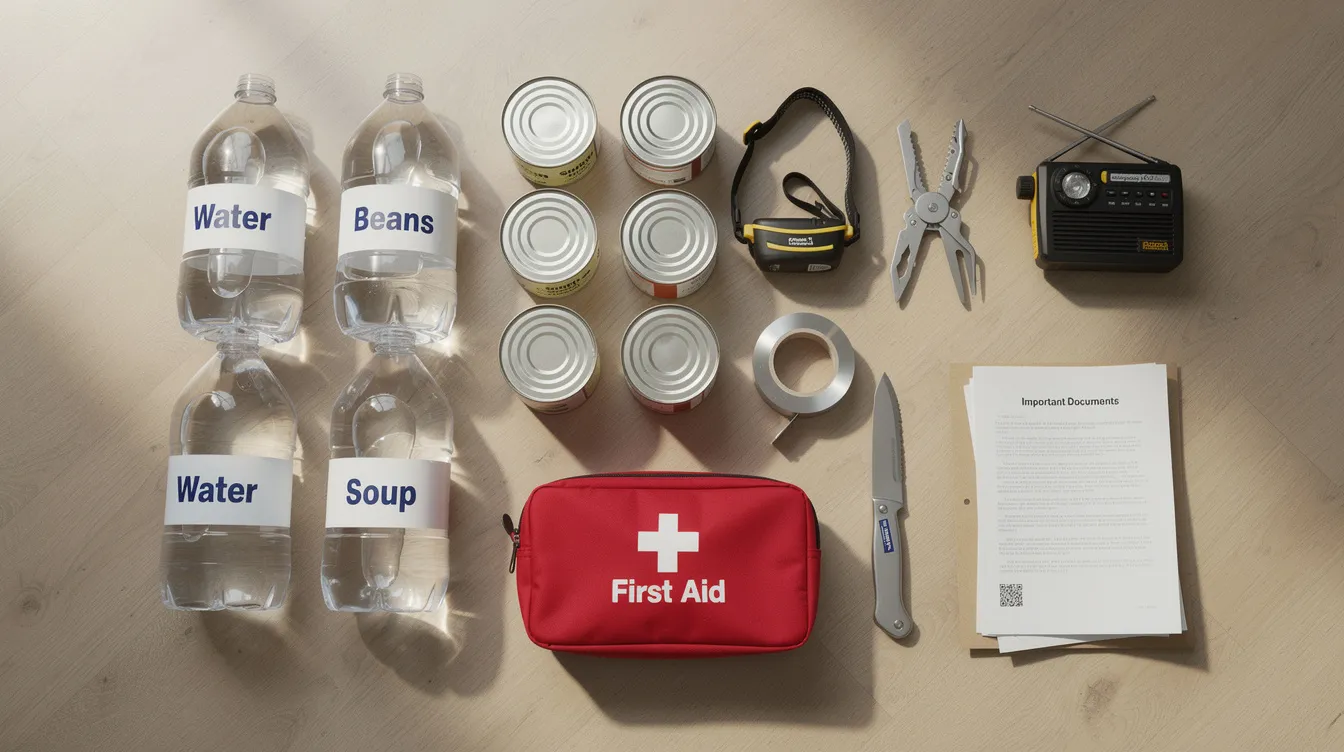
- Photo 1: Flat-lay of the complete earthquake emergency kit on a small apartment floor, every item labeled and visible.
- Photo 2: Close-up HDR shot of a compact backpack packed with a flashlight, extra batteries, whistle, compact first aid kit, and a folded emergency blanket visible at the top.
- Photo 3: A small city apartment entryway with an earthquake survival kit backpack and sturdy shoes staged by the door.
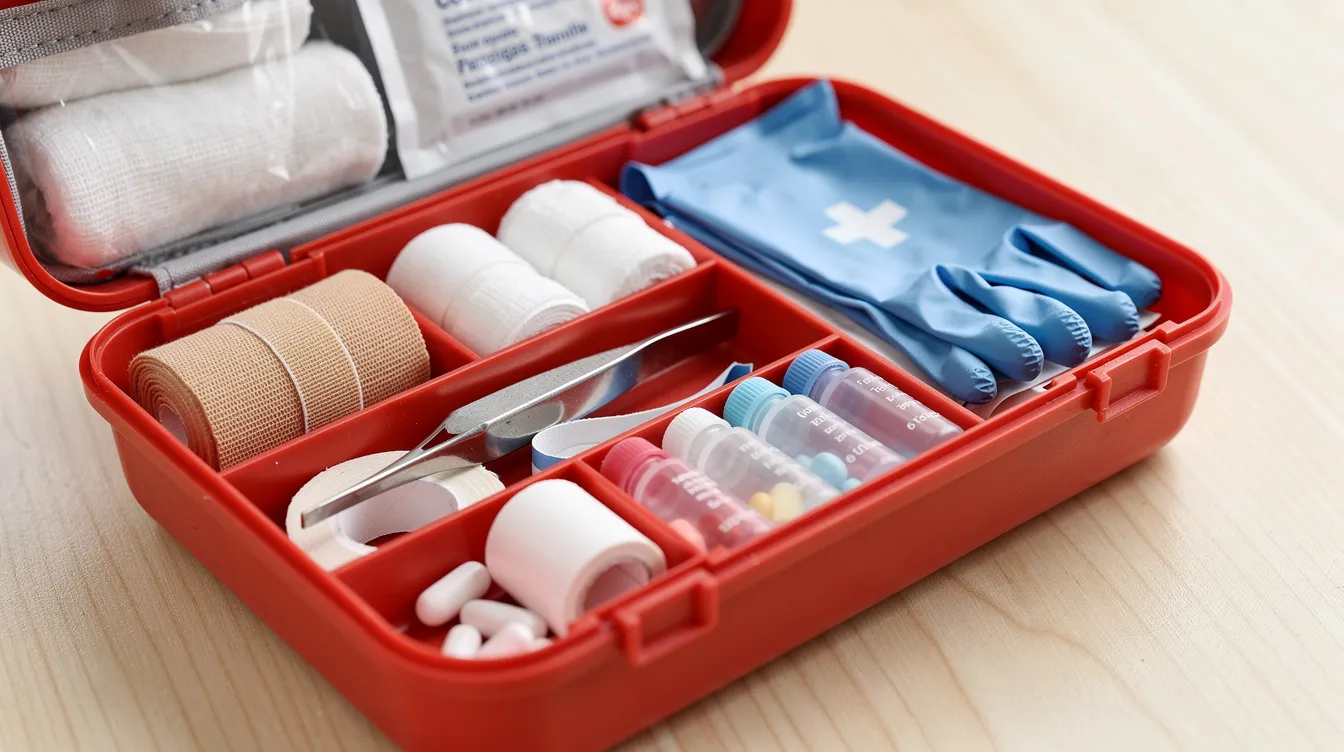
- Photo 4: An organized first aid kit laid open on a table; bandages, antiseptic wipes, gauze, medical tape, tweezers, nitrile gloves, and pain relievers arranged neatly.
- Photo 5: High-contrast HDR close-up of a hand-crank solar radio, headlamp, LED lantern, power bank, and a USB-C cable next to a pack of AA batteries.
- Photo 6: Kitchen-shelf vignette of stacked canned beans, tuna pouches, peanut butter jars, energy bars, and labeled water containers sized for a small pantry.
- Photo 7: Tools on a concrete surface: adjustable wrench, multi-tool, heavy-duty work gloves, a small pry bar, and a roll of black duct tape, dramatically lit from one side.
- Photo 8: Cozily lit shot on a sofa of emergency mylar blankets, a compact sleeping bag, wool socks, a knit hat, layered fleece clothing, and a small LED lantern glowing softly.
- Photo 9: Flat-lay on a wooden desk of printed emergency contact cards, a laminated neighborhood map with highlighted routes, and a smartphone showing an emergency alert app.
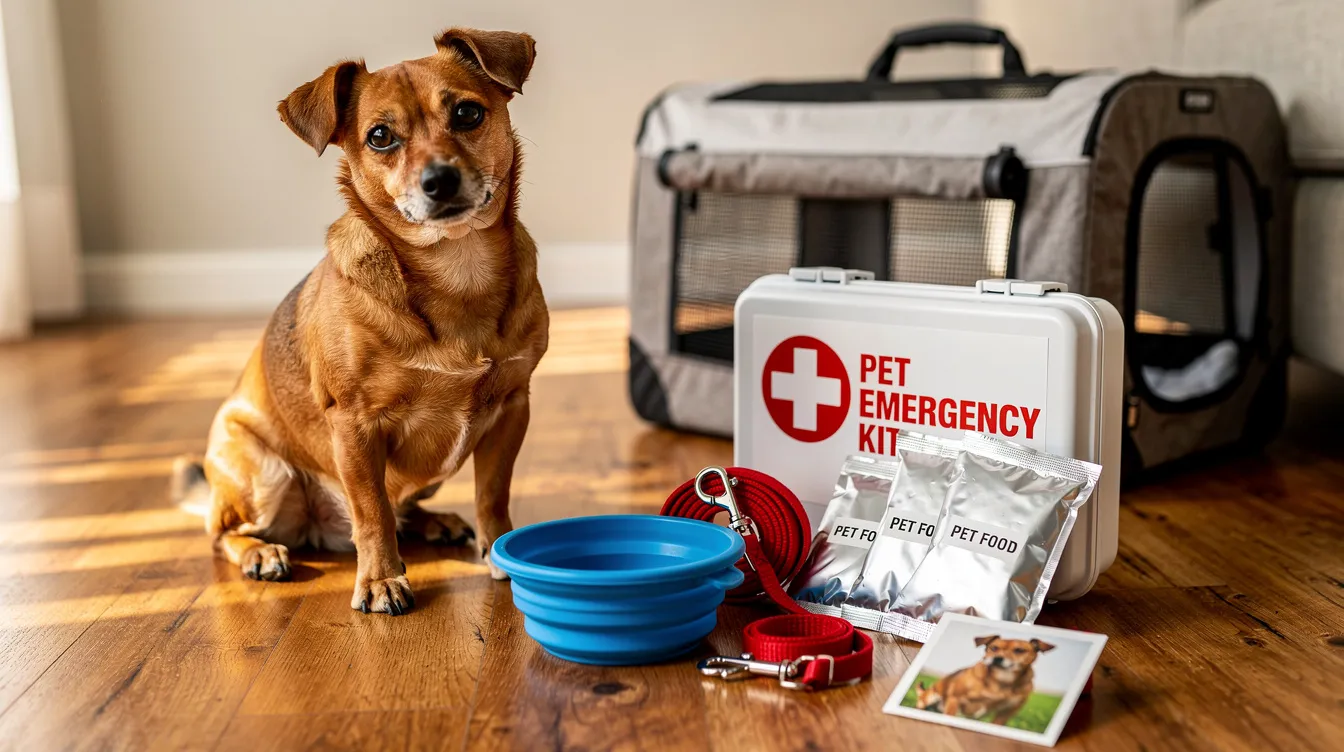
- Photo 10: A small dog sitting next to a labeled pet earthquake kit containing a collapsible water bowl, leash, pet food packets, a photo of the pet, and a carrier in the background.
- Photo 11: Bright daylight car trunk shot of a compact car earthquake kit in a plastic storage box with water bottles, a blanket, a first aid kit, and a high-visibility vest.
- Photo 12: Before-and-after composition showing furniture secured with anti-tip straps and an earthquake kit box tucked in a closet, illustrating small-space organization.
Understanding Earthquake Preparedness in Small Spaces
When a major earthquake hits an urban area, the sequence is fast and predictable: shaking lasts 10 to 60 seconds, heavy furniture slides, cabinets fly open, glass shatters, and then the power goes out. After the shaking stops, water mains may be ruptured, elevators are offline, and roads are blocked by debris.
History puts numbers on this. The 1989 Loma Prieta quake left tens of thousands in the Bay Area without water for 72 hours. The 1994 Northridge earthquake knocked out power to homes for 3 to 5 days. The 2014 Napa quake triggered widespread gas shut-offs and closed shops for 2 to 3 days.
Earthquake preparedness in small spaces differs from general disaster preparedness in a few concrete ways:
- You need a gas shut-off tool because your gas company may not reach your building for days.
- Secure furniture with anti-tip anchors to prevent tipping during shaking.
- Dust masks and eye protection matter more in tight quarters where broken glass and drywall dust concentrate.
- Compact emergency kits are essential for small living spaces and apartments because you cannot store a garage-sized supply cache.
Core Essential Supplies for Your Earthquake Emergency Kit
Store enough supplies for three days per person at minimum. For dense urban areas where roads may stay blocked for several days, aim for 5 to 7 days. Here are the categories, each with 1 to 3 concrete examples:
- Water: At least 1 gallon per person per day in stackable 1- to 2-gallon containers. A 7-gallon water container provides one week's water for one person.
- Food: Canned beans, tuna pouches, energy bars, peanut butter. Include a manual can opener.
- First aid: A commercial 200- to 300-piece first aid kit, plus prescription medications.
- Light and communication: LED headlamp, battery-powered radio, USB power bank rated 10,000 mAh or higher, extra batteries.
- Tools and repair: Adjustable wrench, multi-tool, duct tape, small pry bar.
- Shelter and warmth: Emergency mylar blankets, lightweight sleeping bag, warm layers.
- Sanitation and hygiene: Moist wipes, garbage bags, hand sanitizer, toilet paper.
- Documents and cash: Waterproof copies of IDs, insurance, lease, and $50 to $100 in small bills.
Mobility matters. If your earthquake kit cannot be carried by one person down apartment stairs in a single trip, split it into two smaller bins or bags. Emergency supplies that you cannot move are emergency supplies you will leave behind.
Water and Food: Compact, Long-Lasting Emergency Supplies
Water is the top priority after earthquake damage because ruptured mains contaminate supply lines and store shelves empty within hours. Store enough water for one gallon per person per day; for a two-person household over three days, that is 6 gallons weighing about 50 pounds.
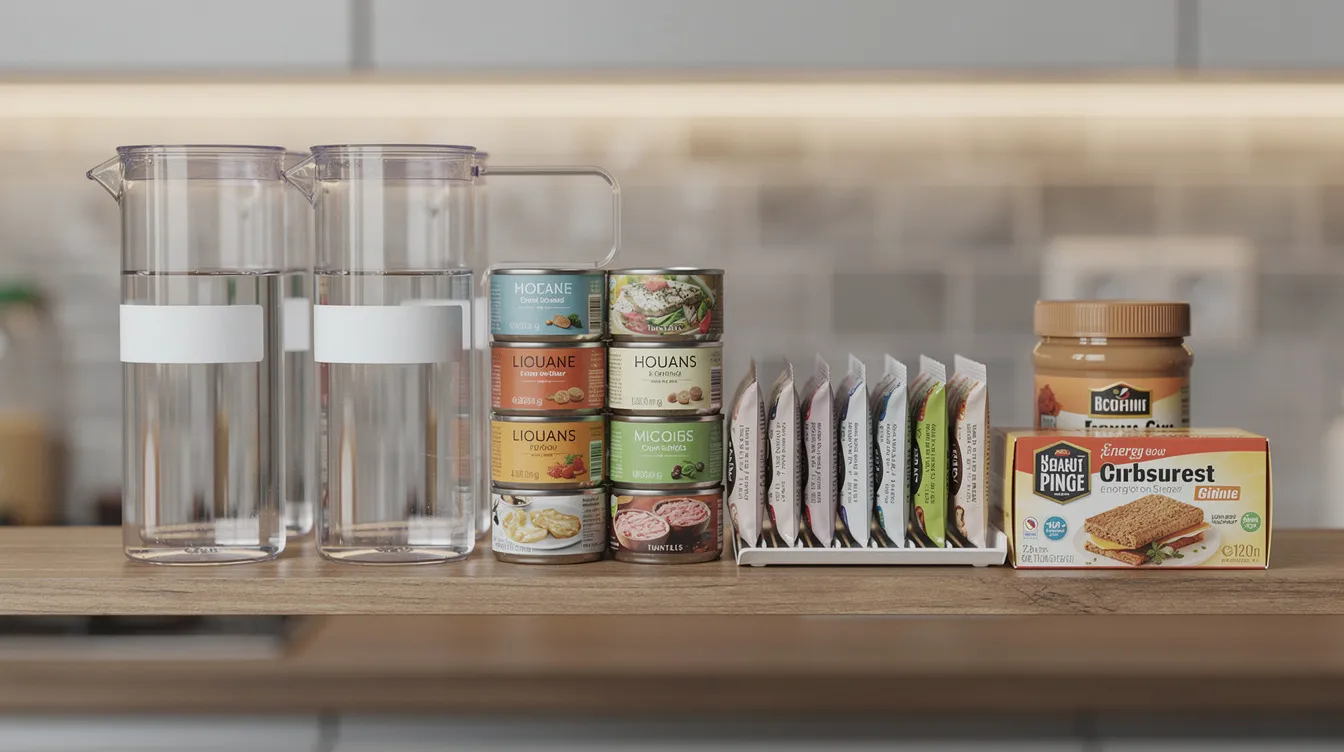
Space-saving water storage options:
- Slim 3-gallon stackable cubes that slide under a bed.
- A 7-gallon Aqua-Tainer stored in a bottom closet or pantry floor.
- Replace stored water every six months for safety; mark the date on each container with a permanent marker.
Keep water purification tablets or a compact filter inside the earthquake kit as backup if stored water runs out.
For food, choose nonperishable food items that do not increase thirst: canned beans (high liquid content), chicken or tuna pouches, nut butters, instant oats, trail mix, and meal bars. Pack enough food for at least three days. Rotate every 6 to 12 months; check in March and September.
Include a manual can opener and disposable utensils. Avoid items requiring cooking fuel, which most apartment leases prohibit indoors.
First Aid Kit: Treating Injuries When Help Is Delayed
After a major earthquake, emergency services can be delayed for hours or days. A well-stocked first aid kit is not optional. Start from a commercially available 200- to 300-piece basic first aid kit and customize it.
Organize contents into labeled pouches:
- Wound care: Adhesive bandages, sterile gauze pads, antiseptic wipes, medical tape.
- Sprain and strain care: Elastic wrap, instant cold packs.
- Medications: Pain relievers, antihistamines, anti-diarrheal tablets. Maintain a 7-day supply of prescription medications in your emergency kit.
- Tools: Tweezers, small scissors, nitrile gloves.
- Trauma items: A tourniquet and hemostatic gauze are worth adding if you take a basic first aid or CPR course.
Pack copies of prescriptions and a list of allergies and medical conditions in a waterproof sleeve inside the aid kit. Emergency preparedness should account for pets and special needs of family members; if you have a pet, keep a separate first aid kit specifically for pets in your supplies.
Light, Power, and Communication When the Grid Fails
Picture this: a nighttime earthquake occurs, power drops across the building, and cell towers are overloaded. Your light and communication plan determines whether the next 72 hours feel manageable or chaotic.
Your gear list:
| Item | Why It Matters | Storage Spot |
| LED headlamp (1 per person) | Hands-free light for navigating debris | Bedside drawer |
| Battery-powered radio with NOAA band | Have a battery-powered radio for emergency communication when cell networks fail | Main earthquake bag |
| USB power bank (10,000+ mAh) | Keeps phone alive for alerts and texts | Earthquake bag |
| Extra batteries (AA and AAA) | Standardized sizes fit most devices | Labeled case in bag |
| Whistle | Audible signal if trapped | Clipped to bag and bedside |
Power banks charged to 80% store better long-term than fully charged units. Solar or hand-crank charging adds redundancy for apartment dwellers who lack generator access; solar panels built into portable chargers work even on a windowsill.
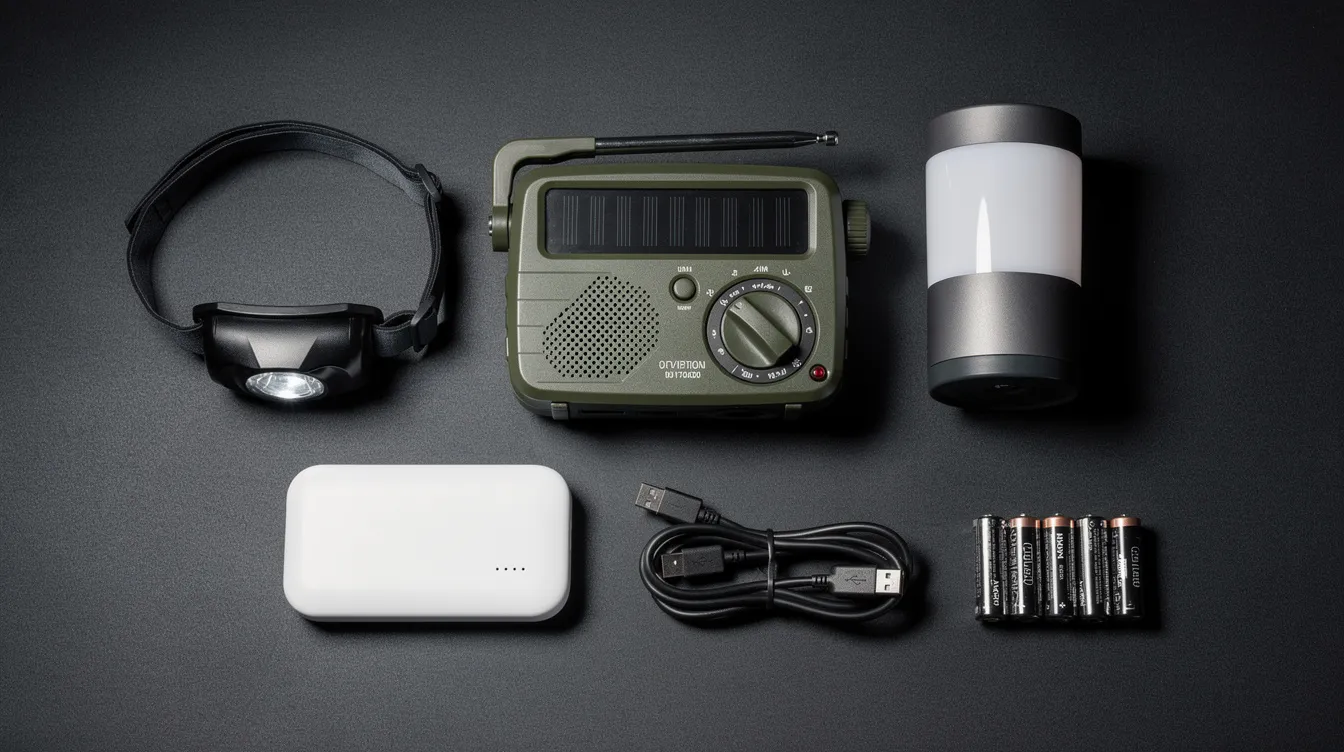
Conserve phone power after a quake by switching to airplane mode, lowering brightness, and using it only for essential communication. Store one flashlight and whistle by every bed; keep the main set inside or attached to the earthquake bag.
Tools, Duct Tape, and Safety Gear for Post-Quake Repairs
Even in a small apartment, a few well-chosen tools reduce danger after an earthquake occurs. A gas shut-off tool can turn off gas after an earthquake; know how to shut off gas and water supplies for safety during emergencies before the ground starts shaking. Contact your gas company for the valve location if you are unsure.
Must-have tools:
- Adjustable wrench or dedicated gas shut-off wrench
- Multi-tool with pliers, knife, and screwdriver bits
- Small pry bar for jammed doors or shifted debris
- Duct tape: temporary window repairs, securing tarps, binding broken items, even improvised splints. Duct tape can repair many items damaged during an earthquake.
- A fire extinguisher is crucial for preventing post-earthquake fires; a compact 2-lb ABC extinguisher fits on a closet shelf.
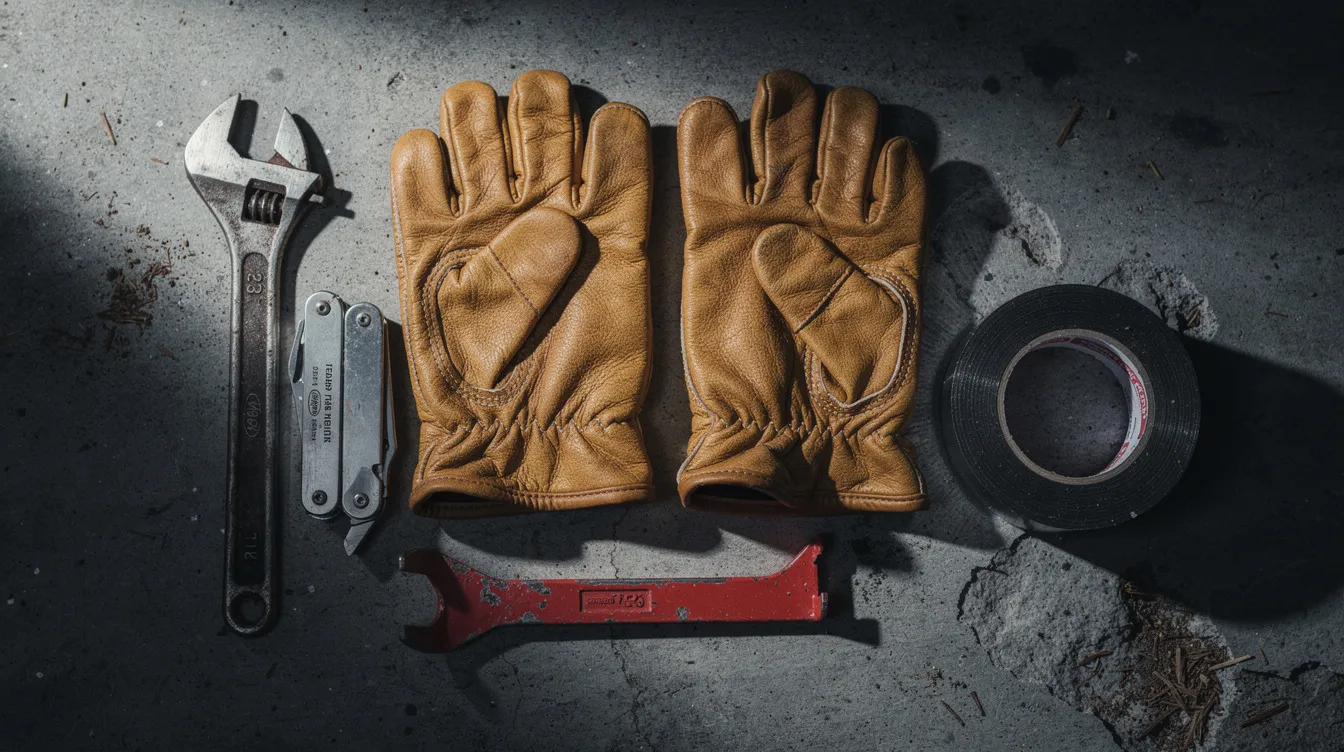
Safety gear rounds out the kit: heavy-duty work gloves protect hands from broken glass, N95 dust masks filter airborne particles from collapsed drywall, and protective eyewear shields against shattered glass. A sturdy pair of shoes protects feet from debris after an earthquake.
Keep all tools together in a compact pouch or shallow bin that slides under a bed. These are for hazard reduction and minor repairs, not for replacing professional structural inspections after serious earthquake damage.
Shelter, Warmth, and Clothing in a Compact Earthquake Kit
Even if your building is still standing after a quake, it may be unsafe to stay inside or the heat may be off. Add comfort items such as sturdy shoes and thermal blankets to your kit.
Compact shelter items:
- Emergency mylar blankets (pack of 4 weighs under 8 oz)
- A lightweight sleeping bag or quilt per person
- A small tarp if outdoor shelter becomes necessary
Key clothing: sturdy shoes, thick socks, long pants, a fleece or wool mid-layer, hat, and gloves. Store emergency supplies in sturdy, easy-to-carry containers; vacuum compression bags cut clothing volume by roughly 50%, making them ideal for under-bed storage.
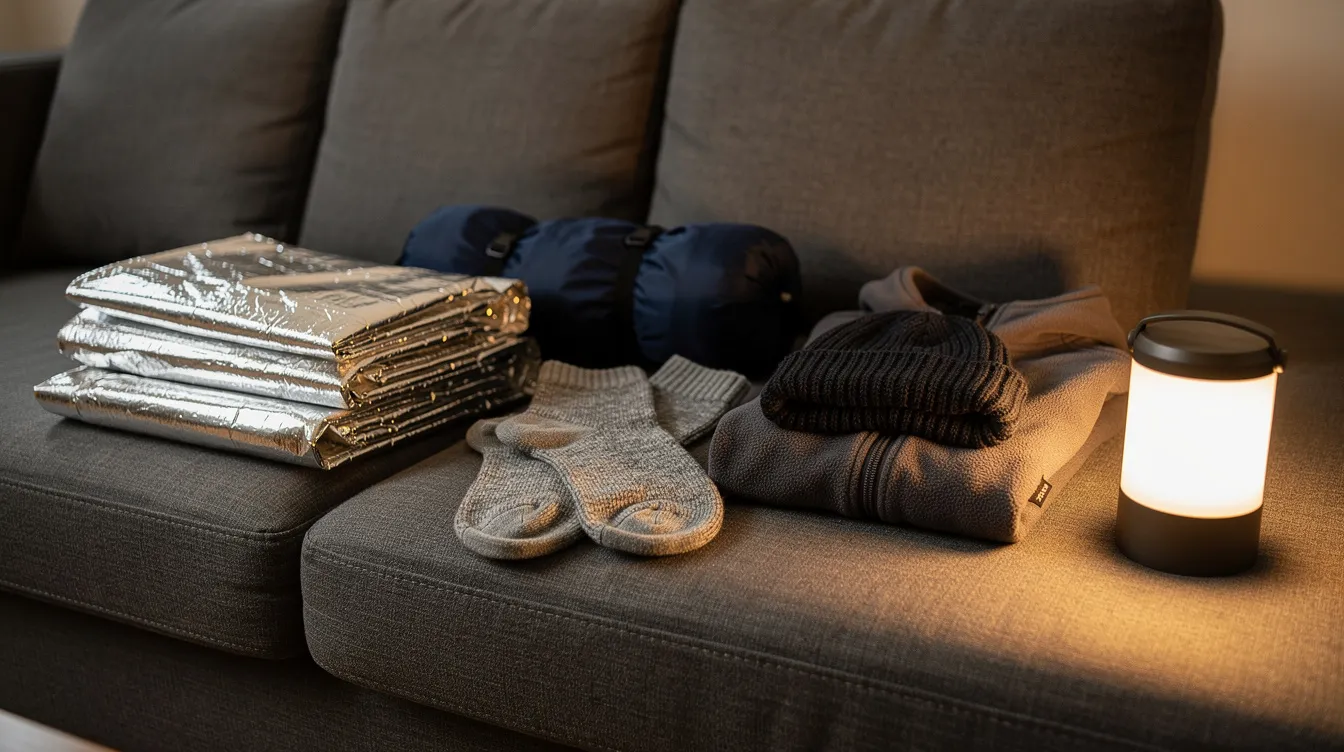
Climate-specific notes: in hot regions like Southern California, swap heavy insulation for light breathable layers and sun protection. In colder zones like the Pacific Northwest, add hand warmers and a second insulation layer. Rotate seasonally in October and April to match local weather.
Hygiene, Sanitation, and Health in Tight Quarters
After a quake, toilets may not flush, water is limited, and trash pickup stops. Emergency kits should contain hygiene supplies and sanitation products to prevent infection and maintain morale.
Small-space sanitation solutions:
- Heavy-duty garbage bags (double as waste liners and waterproofing)
- Zip-top bags for sealing waste and controlling odor
- Moist wipes, travel-size soap, and hand sanitizer
- A roll of toilet paper in a waterproof bag
- A lined 5-gallon bucket with a snap-on lid and absorbent material (kitty litter or sawdust) serves as an emergency toilet
Personal hygiene items: toothbrush, toothpaste, menstrual products, and a small tissue pack for each person in the household. Store these together in a dedicated "hygiene pouch" inside the larger earthquake emergency kit.
In multi-unit buildings, seal all waste in bags before placing it in common areas. Never block shared hallways or fire exits with refuse.
Documents, Cash, and Planning for the Aftermath
After disaster strikes, paperwork determines how fast you recover. Keep waterproof copies of important documents in your emergency kit: government-issued ID, insurance policies, lease or mortgage paperwork, medical records, and pet vaccination records.
Store important documents in a fireproof safe for protection at home; keep duplicates in the earthquake bag for grab-and-go scenarios. Photograph every room in your apartment before a quake to document pre-existing conditions; renters need this evidence for landlord claims and insurance.
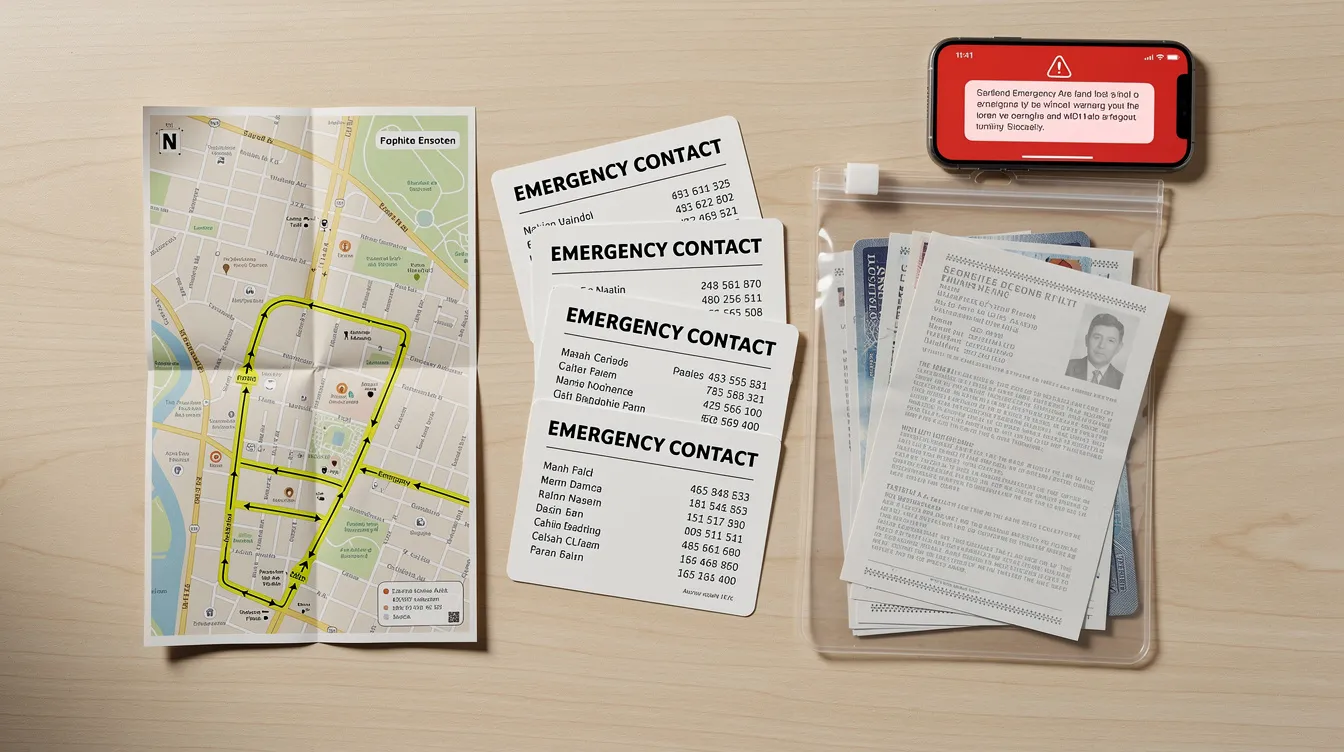
In case of power outages, keep cash in small bills for emergencies; ATMs and card terminals go offline when the grid fails. $50 to $100 in fives and tens covers immediate needs.
Communicate a meet-up plan with family members before an earthquake: choose a primary and backup meeting spot, designate an out-of-area contact who can relay messages, and print a contact list (doctor, landlord, insurance agent, local emergency hubs). Do not rely solely on your phone.
Emergency preparedness should account for pets and special needs of family members. Pets should be microchipped and have current ID tags. Keep contact information for pet care facilities in your emergency kit. Pets should be current on their vaccinations for shelter stays. Include extra pet food in your emergency supplies.
Where to Store Your Earthquake Kit in a Small Home or Apartment
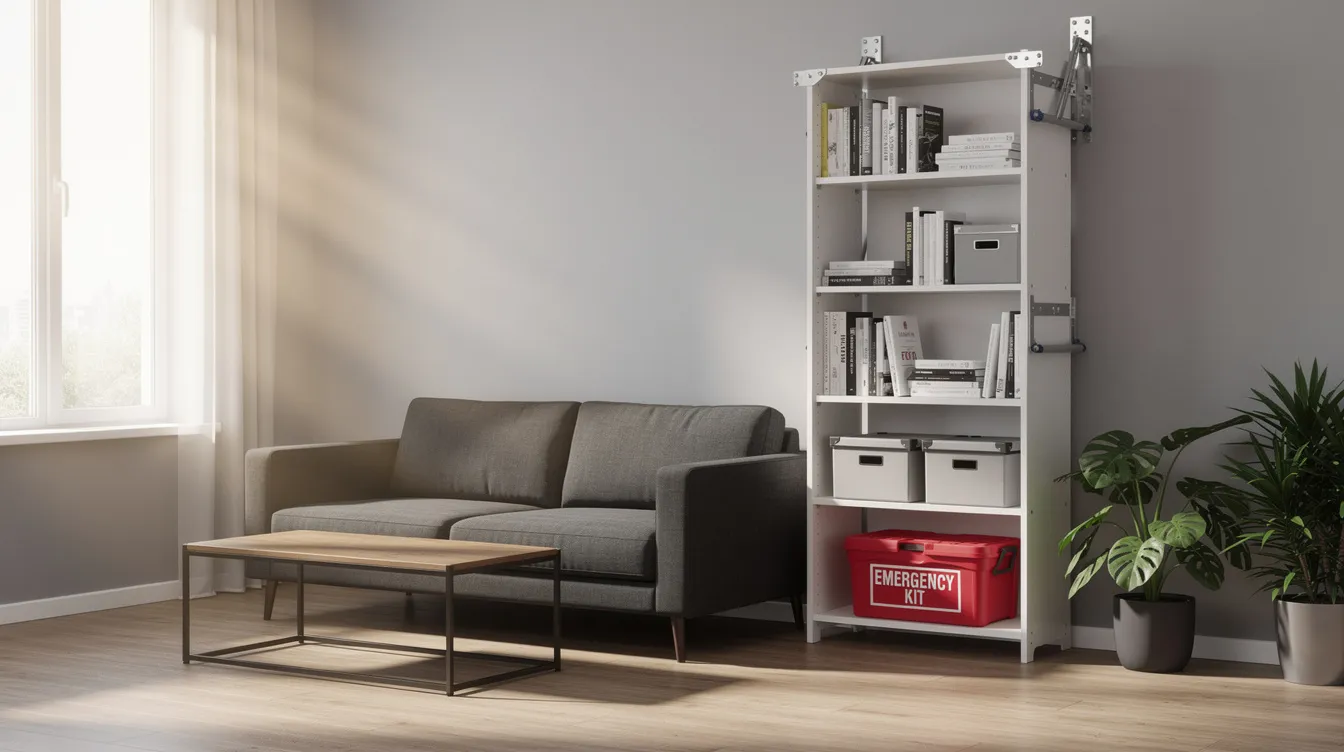
A perfect kit stored in the wrong place is useless if blocked by debris or a jammed door. Store heavy items like water low to avoid injury if they fall during shaking. Never put a 7-gallon water container on a high shelf.
Best storage locations for apartments:
| Location | What to Store | Why It Works |
| Under the bed | Water containers, main supply bin | Low center of gravity; accessible from sleeping position |
| Bottom of hallway closet | Tools, shelter gear, hygiene pouch | Near exit; unlikely to be blocked |
| Entryway shelf or hook | Grab-and-go backpack, shoes | Fastest access during evacuation |
| Car trunk or storage locker | Duplicate car earthquake kit | Backup if home is inaccessible |
Keep emergency supplies in a waterproof bin for accessibility. Renters who move frequently should use modular containers (backpacks, duffel bags, small plastic bins) that transfer from one apartment to the next without repacking.
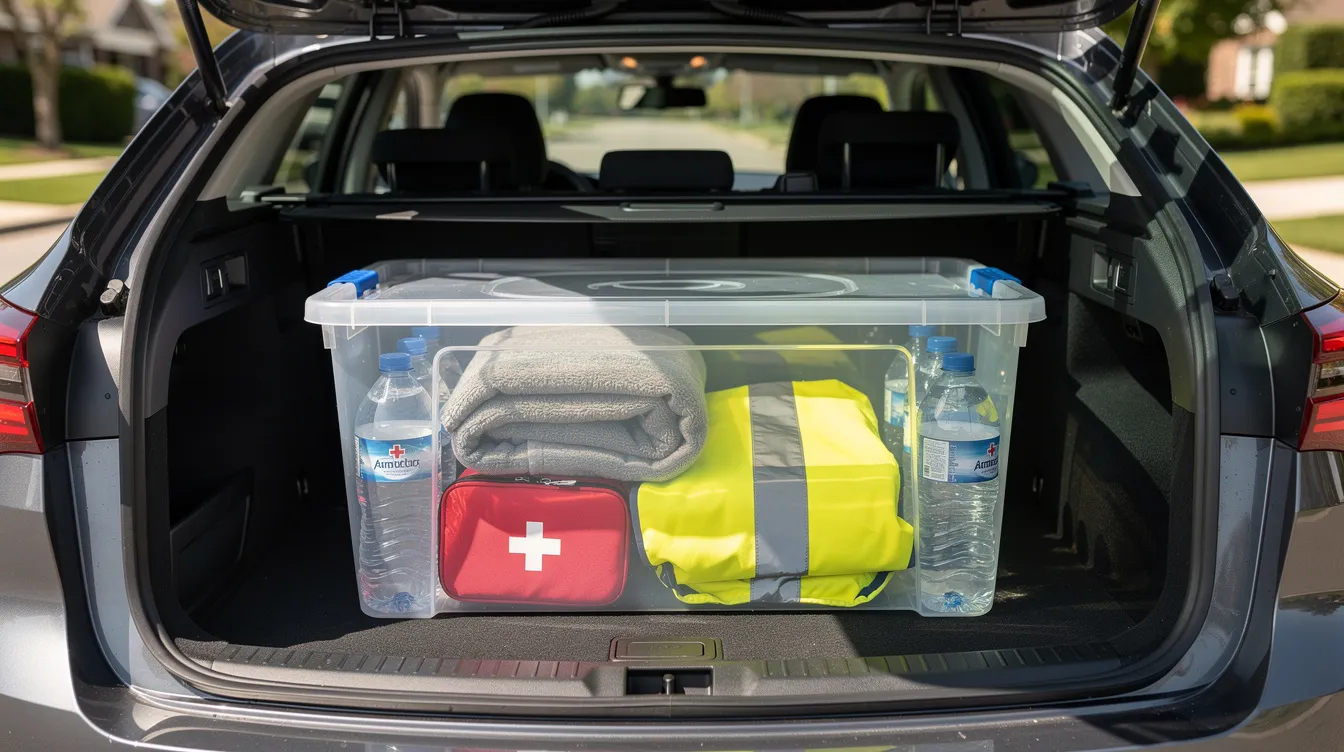
Label each container with its contents and the date it was last updated. Place mini kits in multiple locations: a bedside essentials set (flashlight, whistle, shoes), the main earthquake bag in a closet, and a small kit in your car.
Maintaining, Updating, and Practicing with Your Earthquake Bag
Disaster preparedness is a habit, not a one-time project. Kits need maintenance to stay reliable. Check and maintain your emergency kit every six months; set calendar reminders for March and September.
During each check:
- Replace stored water every six months for safety.
- Rotate supplies regularly to ensure they are not expired; swap food, batteries, and medications.
- Test the emergency radio, headlamp, and multi-tool. Repack the aid kit after confirming every item is present.
- Update for life changes: new baby, new pet, new roommate, chronic illness, or a move to a different climate or building type.
Run a 15-minute household drill where everyone practices grabbing the earthquake kit, identifying the gas shut-off valve, and moving to a safe spot. If you have family members in the home, confirm that each person knows where the kit lives and how to carry it down stairs.
A survival kit that sits untouched for two years is a box of expired food and dead batteries. Fifteen minutes of maintenance twice a year keeps everything ready for the moment the ground shakes and you need to protect yourself, your household, and your pets.
At Small Space Emergency, our goal is to make realistic, compact earthquake preparedness doable for busy urban households. Set your first reminder today, open your kit, and confirm it is ready for life.
Editorial note: this guide provides general preparedness information, not emergency, medical, legal, or engineering advice. Recommendations are cross-checked against public emergency-management guidance and adapted for small-space living. During an active emergency, follow your local authorities and emergency services. See our editorial standards and affiliate disclosure.